Other than that awesome intro Grenn Dal gave me, not much to say! I'm glad to be here, and I'm sure you'll get to know me in time. I wanted to start with this project I've been working on for the club.
Project Name: Martian Mining Board
Goal/Project Overview:
- Three 2x4 foot sections that are moderately modular.
- Two hill sections and one flatter section with some moderate depressions carved out of them.
- 4-6 larger machinery / mining / industrial pieces
- 4-6 smaller scatter terrain, LOS blocking or barricade style pieces.
- One 2x4 foot section with three step hill levels.

To start, I sourced this awesome 2x2 ft foam from Home Depot (DIY / Builders store here in 'Merica") I bought four panels, two for each section. I wanted to test my planning before I bought into the rest of the projects.
Note - I know it's cheaper to buy the huge one and have them cut it up, but as I live in an apartment, space is tight and my care can't exactly transport a 20 foot section (or a six foot one, for that matter!)


Between this step and the next, I spent time attacking all the edges with a steel ruler and a knife. You can see some of the handiwork in the background.

Second part of the hills completed. You can see that the smaller hills and larger hills match up (mostly!) and that both hills have access points for troops and tanks.

I was tempted by this layout but it would create too many chokepoints for some units and the like. So I settled on the first one.

White chunks are rocks made out of plaster of paris using some railway molds I purchased. Additional note to self - when it says let dry overnight, let dry overnight.
Second mistake, not diluting the glue with some water to spread it apart and avoid weird ridge lines as seen to the right. I had to go back and fill in several different sets of holes. Which was REALLY obnoxious.


Used more filler to try and cover the gap. Got impatient after only one layer. Shouldn't have (but that's my own fault)
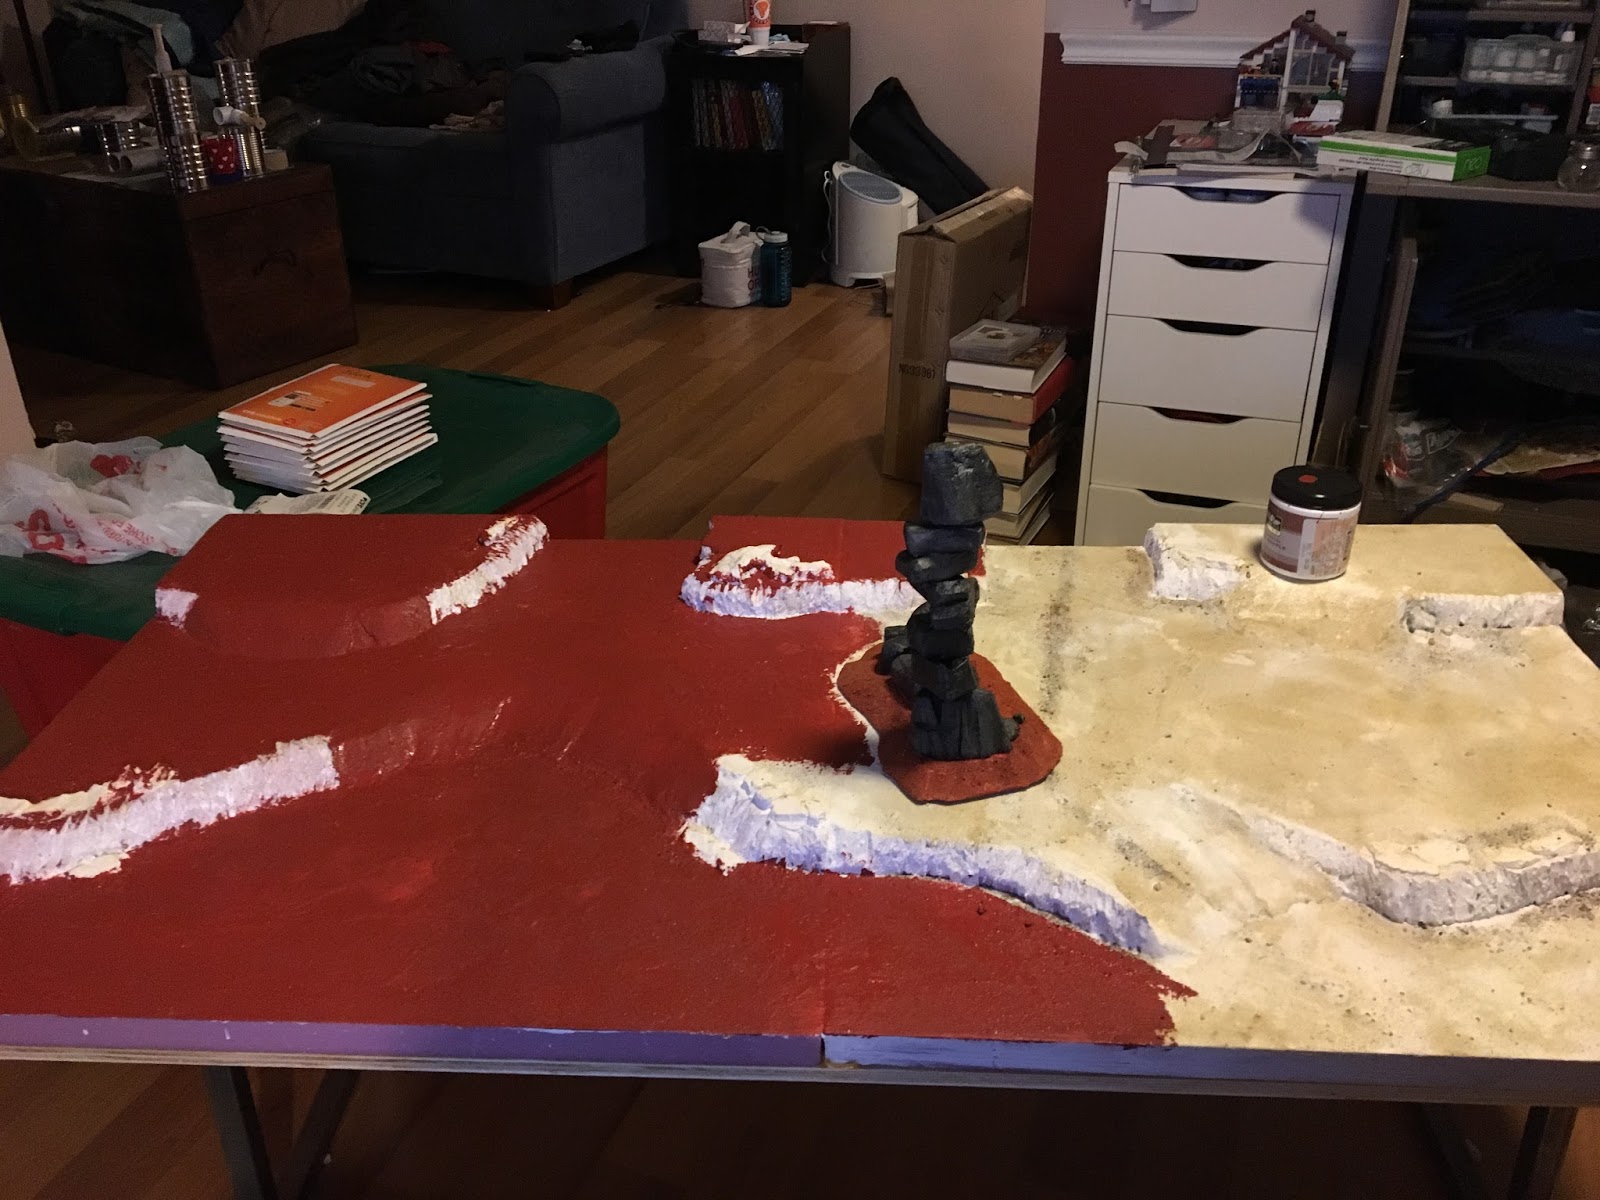
Painting in progress.

Mostly done now! Rocks painted with a black-wash and a double layer of grey dry-brushing. Red is Deco Red house paint by Behr and Rusty Gate as a heavy dry brush. I also lightly drybrushed the rocks with the orangy-red as well to add some additional highlights and texture.

So, one part down, two to go! Here's the assembled 'stuff' to continue building material supplies.

Thoughts? Questions? Want more?
Blockade, over and out.